Server
Configuration
To configure your CasparCG Server, normally you would need to open the caspar.config file with a code editor and write some XML-Code. The file looks something like this:
<configuration>
    <paths>
        <media-path>media/</media-path>
        <log-path disable="false">log/</log-path>
        <data-path>data/</data-path>
        <template-path>template/</template-path>
    </paths>
    <lock-clear-phrase>secret</lock-clear-phrase>
    <channels>
        <channel>
            <video-mode>720p5000</video-mode>
            <consumers>
                <screen />
                <system-audio />
            </consumers>
        </channel>
    </channels>
    <controllers>
        <tcp>
            <port>5250</port>
            <protocol>AMCP</protocol>
        </tcp>
    </controllers>
    <amcp>
        <media-server>
            <host>localhost</host>
            <port>8000</port>
        </media-server>
    </amcp>
</configuration>
To make the configuration a lot easier, rrebuffo developed the CasparLauncher.
Start the Launcher, go to the settings tab and click on "Edit file". This opens a much more user-friendly view of the config file:
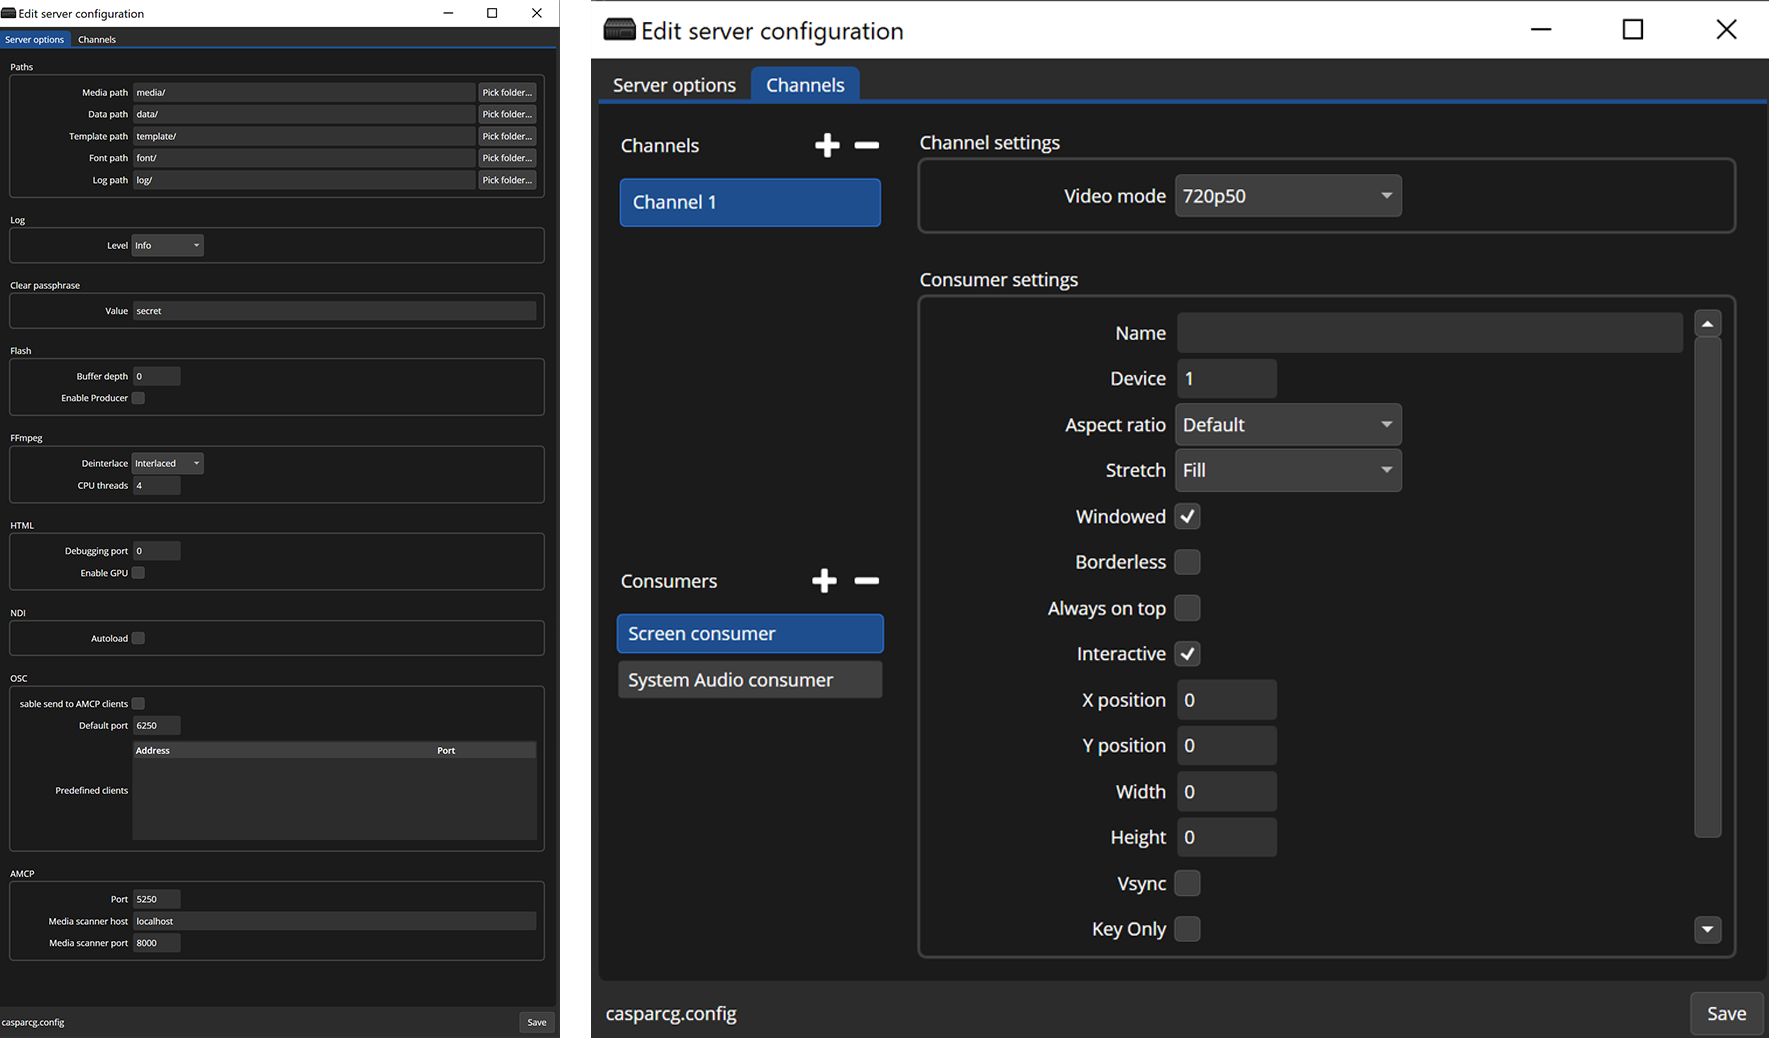
That is the easiest way to configure your CasparCG Server. Don't forget to restart the server after saving the config-file.
Channel & Consumer
In CasparCG you can have multiple Channels. Channels are the outputs of CasparCG. Every output needs a Video mode. (You can choose different modes for different Channels) But channels are only "virtual" outputs. Without assigning a Consumer you won't see anything. You can add multiple Consumers on every Channel, e.g. a screen consumer (window on your computer), a Blackmagic Decklink Card Output, NDI, ... . This is where your Channel output goes. This might be a little confusing first, but it gives you very much flexibility at the end.
This is also where you can define you Fill&Key channels if you want to send them separately to your video-switcher.